Healthy Comfort Food (It DOES Exist!)

It’s been awhile since I’ve blogged! I have been sick for the past month, and after finally going to the doc, I found out I had strep throat. Awesome. But I’m slowly but surely getting rid of all the yuckiness! This week I’ve jumped back into the swing of things with working out (even twice a day if I have time–discovered my bro in Granbury was doing 2-a-days to try to get a leg up in our family weight loss challenge this year… we’ll see about that!) and eating well (I used my illness to justify eating pints of Ben & Jerry’s ice cream. Ugggh.).

Today’s recipe is one of my favorite things to make, especially for people who don’t like “healthy” food–Spaghetti Squash Spaghetti. I mean, everyone loves spaghetti right?! This recipe takes a little longer than boiling noodles and warming up a jar of sauce, but it is totally worth it. I believe I have perfected my homemade marinara sauce (it only took me about 5 tries! haha), so trust me–you will never want to buy sauce again after you try this recipe!

First, preheat your oven to 375F. Using a sharp knife, cut the ends off of the spaghetti squash, and then cut it in half lengthwise. You will need to put some muscle into it, but be careful to not cut yourself! Drizzle a little bit of olive oil, and sprinkle some salt and pepper on the inside before putting on a sheet pan to roast.

Image              Image

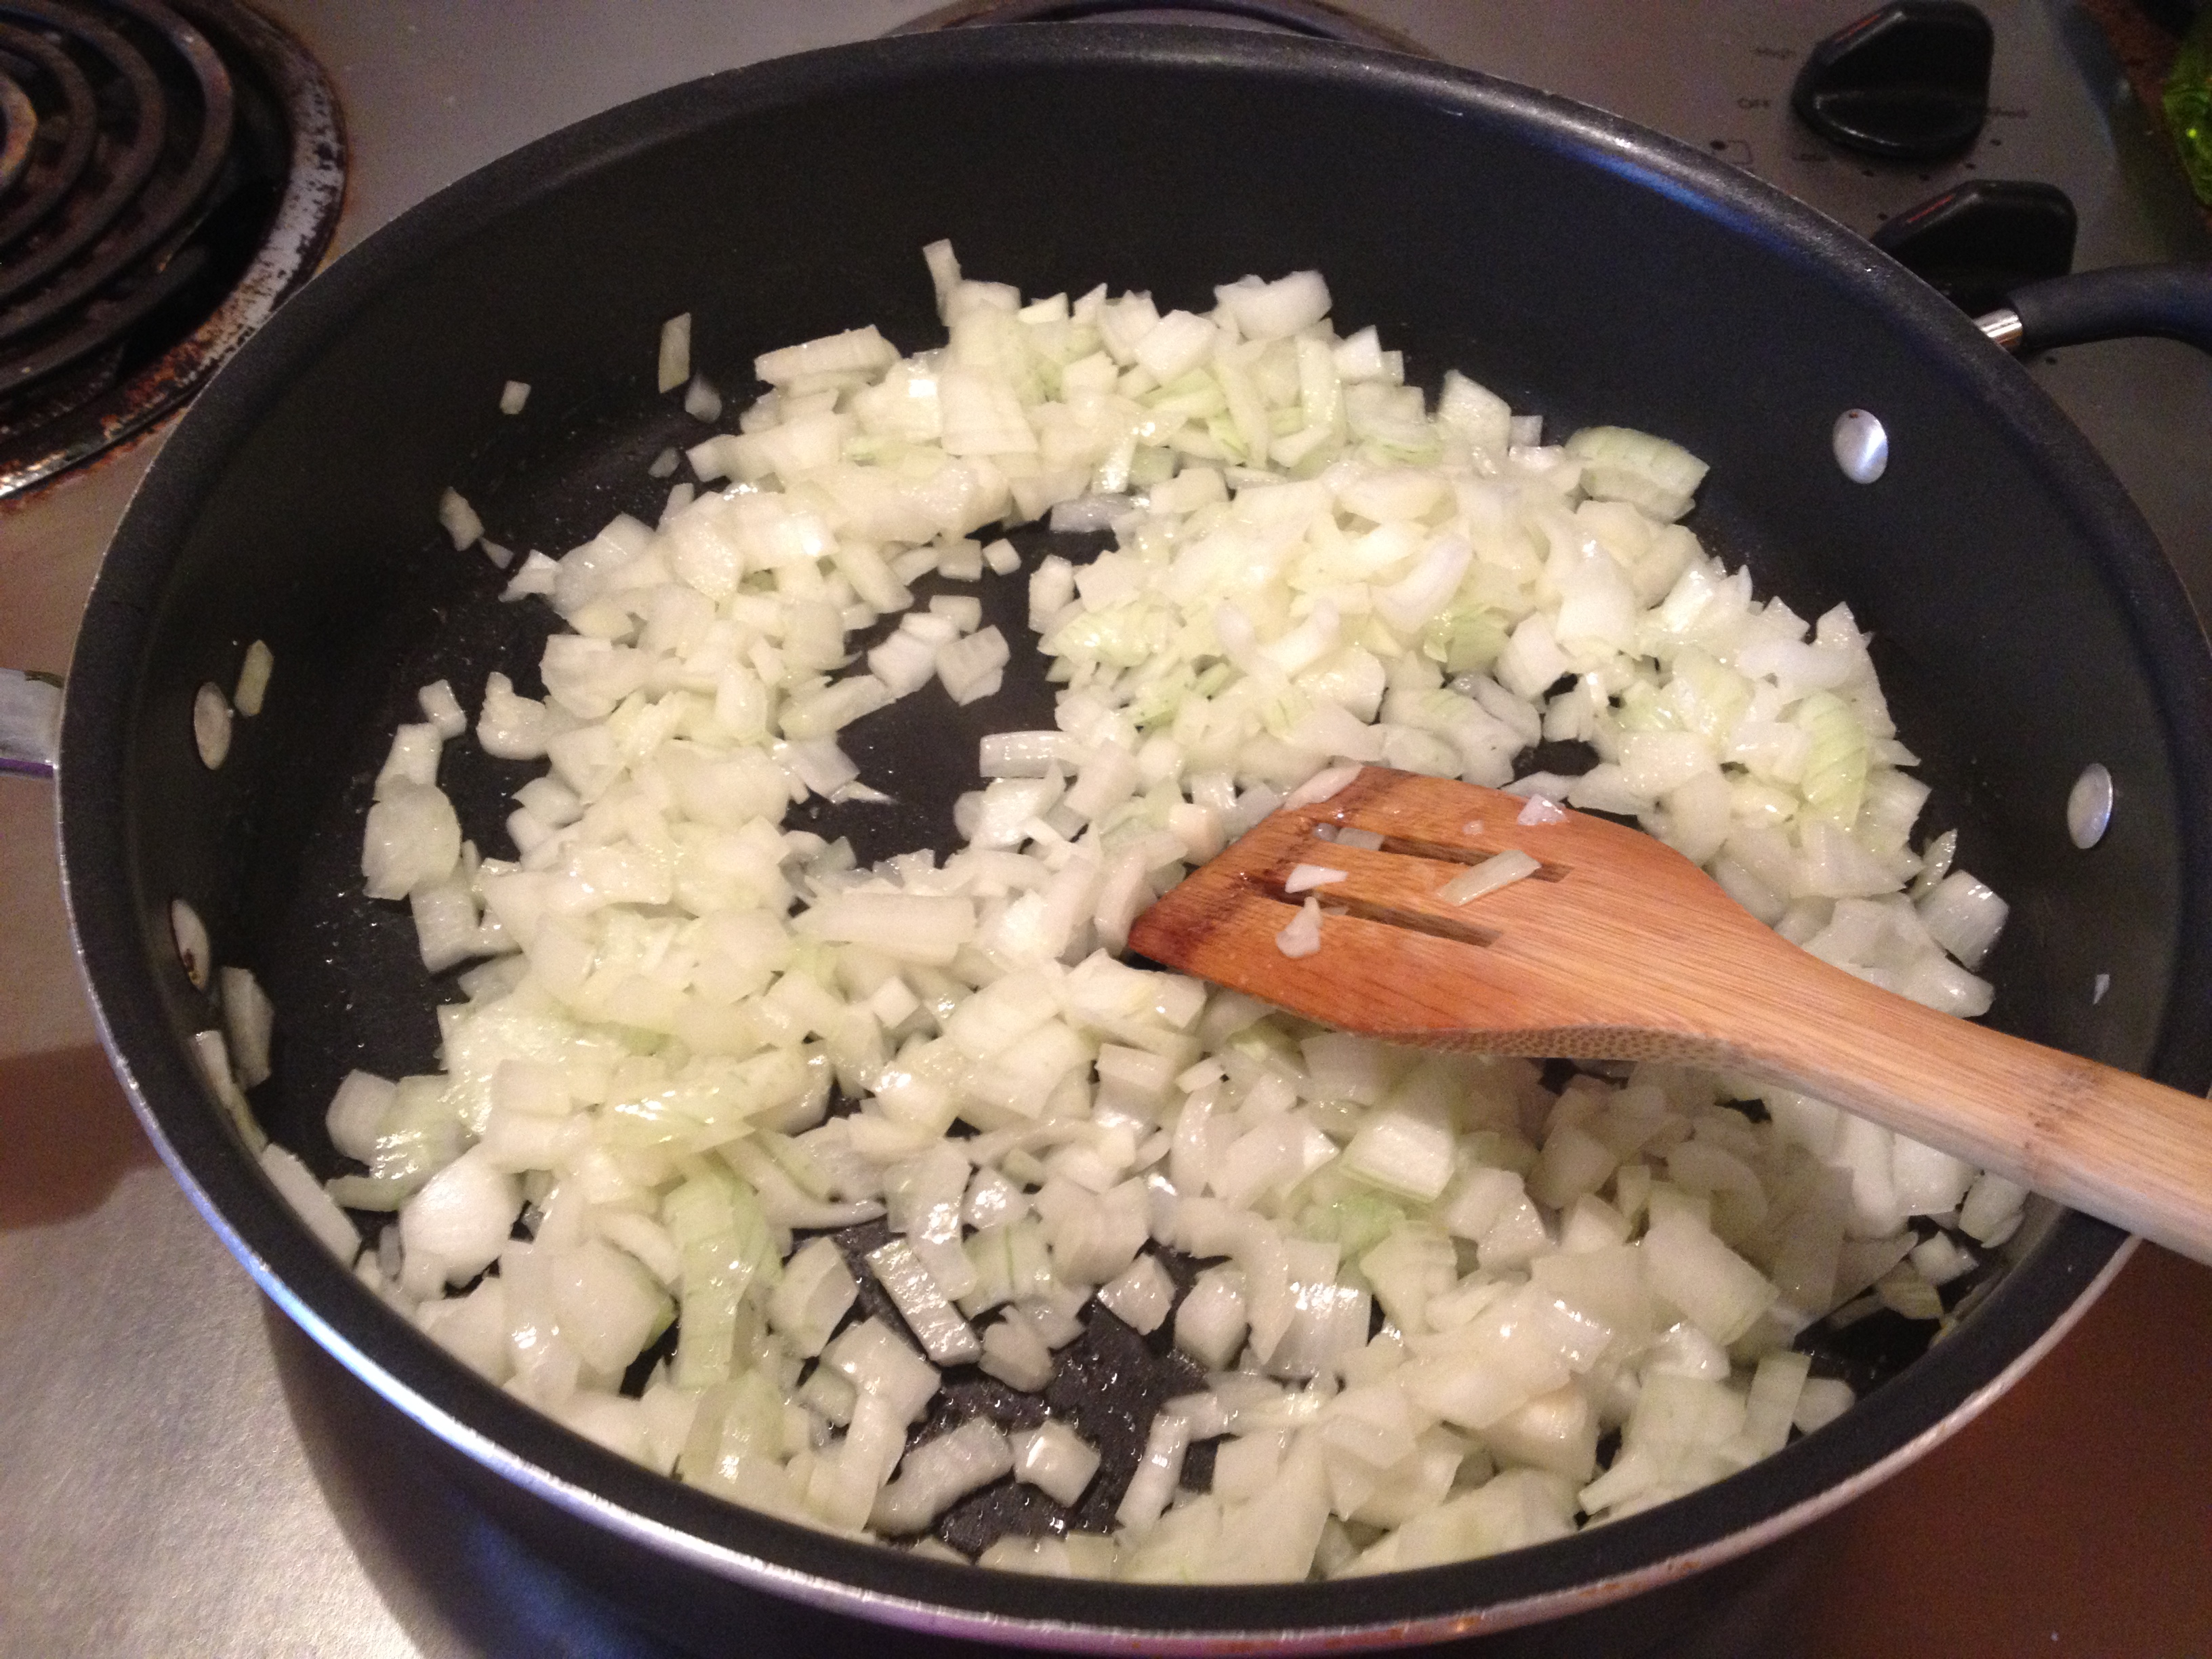
Roast the squash for about 40-45 minutes. This was a fairly small one, so a large one (like in the summer when they’re in season) would probably take about an hour. Using a hot pad or towel, check to see if it has softened some when you squeeze it. You don’t want it to be too soft though, otherwise your “spaghetti” will no longer look like noodles and will just be a pile of mush! (I know this because it’s happened to me!) While this is roasting, get started on your sauce. A lot of famous chefs and recipes (eh hm.. Alton Brown) call for a low and slow cooking process when making spaghetti sauce, but as most of you know, I am impatient and want my sauce in an hour or less! A tip for this part is to think of it like you are building your sauce one layer of flavor at a time. I start with the onions, then garlic, and continue adding ingredients based on what needs the longest or shortest amount of cooking time (I do this same thing when making a stir-fry or veggie mix of some sort so that everything has a similar texture.). So preheat a large saute pan (need a pretty big pan for this!) to Medium heat with about 1 tblsp of olive oil while you start chopping your onion. Add one diced onion to the pan and add about 1 tsp. of salt (salt pulls out the moisture in onions & mushrooms and aids the cooking process! I’m not really sure the science behind it, but I know everyone on the Food Network does it… so yeah!). While the onion is cooking, mince 3-4 cloves of fresh garlic and add to the pan. Stir occasionally to keep it from burning.

Image

At this point you can add meat if you want to. Today, I added about 1 pound of lean ground turkey. Usually, I leave the meat out and enjoy a lovely vegan meal! So, if you’re not a meat lover, skip this step and continue everything else the same. If you are one of those people who absolutely must have meat with every meal– here’s your chance to beef it up. Speaking of beef–I’ve used lean beef before and it’s pretty good that way too. I suggest using a very lean meat, whatever you choose, so that you don’t have a lot of excess grease in your sauce. Yuckkk. So once the onions and garlic have cooked for a bit and started to look translucent, add in your meat and brown it with some salt, pepper, and italian seasoning. While your meat is browning, chop the ends off of about 2 cups of brusselsprouts and peel off the outer layer that has brown junk and people’s germs and dirt on it. These will be a tasty garnish on top of your spaghetti, and if you’re going the vegan route, they give it a nice “meatball” appearance. Cute, huh? I stole that idea from The Crafthouse here in Lubbock.

Image

Once your meat is browned (no red/pink spots!), deglaze your pan with a little bit of dry white wine (about 1/2 cup). This helps your meat not to burn while you continue building the sauce and makes it extra tasty, of course. If you don’t have wine, you can skip it. Just make sure you keep an eye on your pan and stir frequently while you continue to chop other stuff. Next, slice one container of mushrooms (I used baby portobellas) and add to the pan (add a little salt again! don’t worry!). Then, add in some cherry tomatoes, sliced in half. You can add any kind of fresh tomato you like. I just really love cherry tomatoes. I used an entire container of the Sun Harvest kind. I think adding some chopped fresh tomato gives the sauce some good tomato chunkiness, which is especially good if you’re not using meat or mushrooms (both optional, but you really need onions, garlic, tomatoes, and fresh herbs… for sure!).

Image     Image

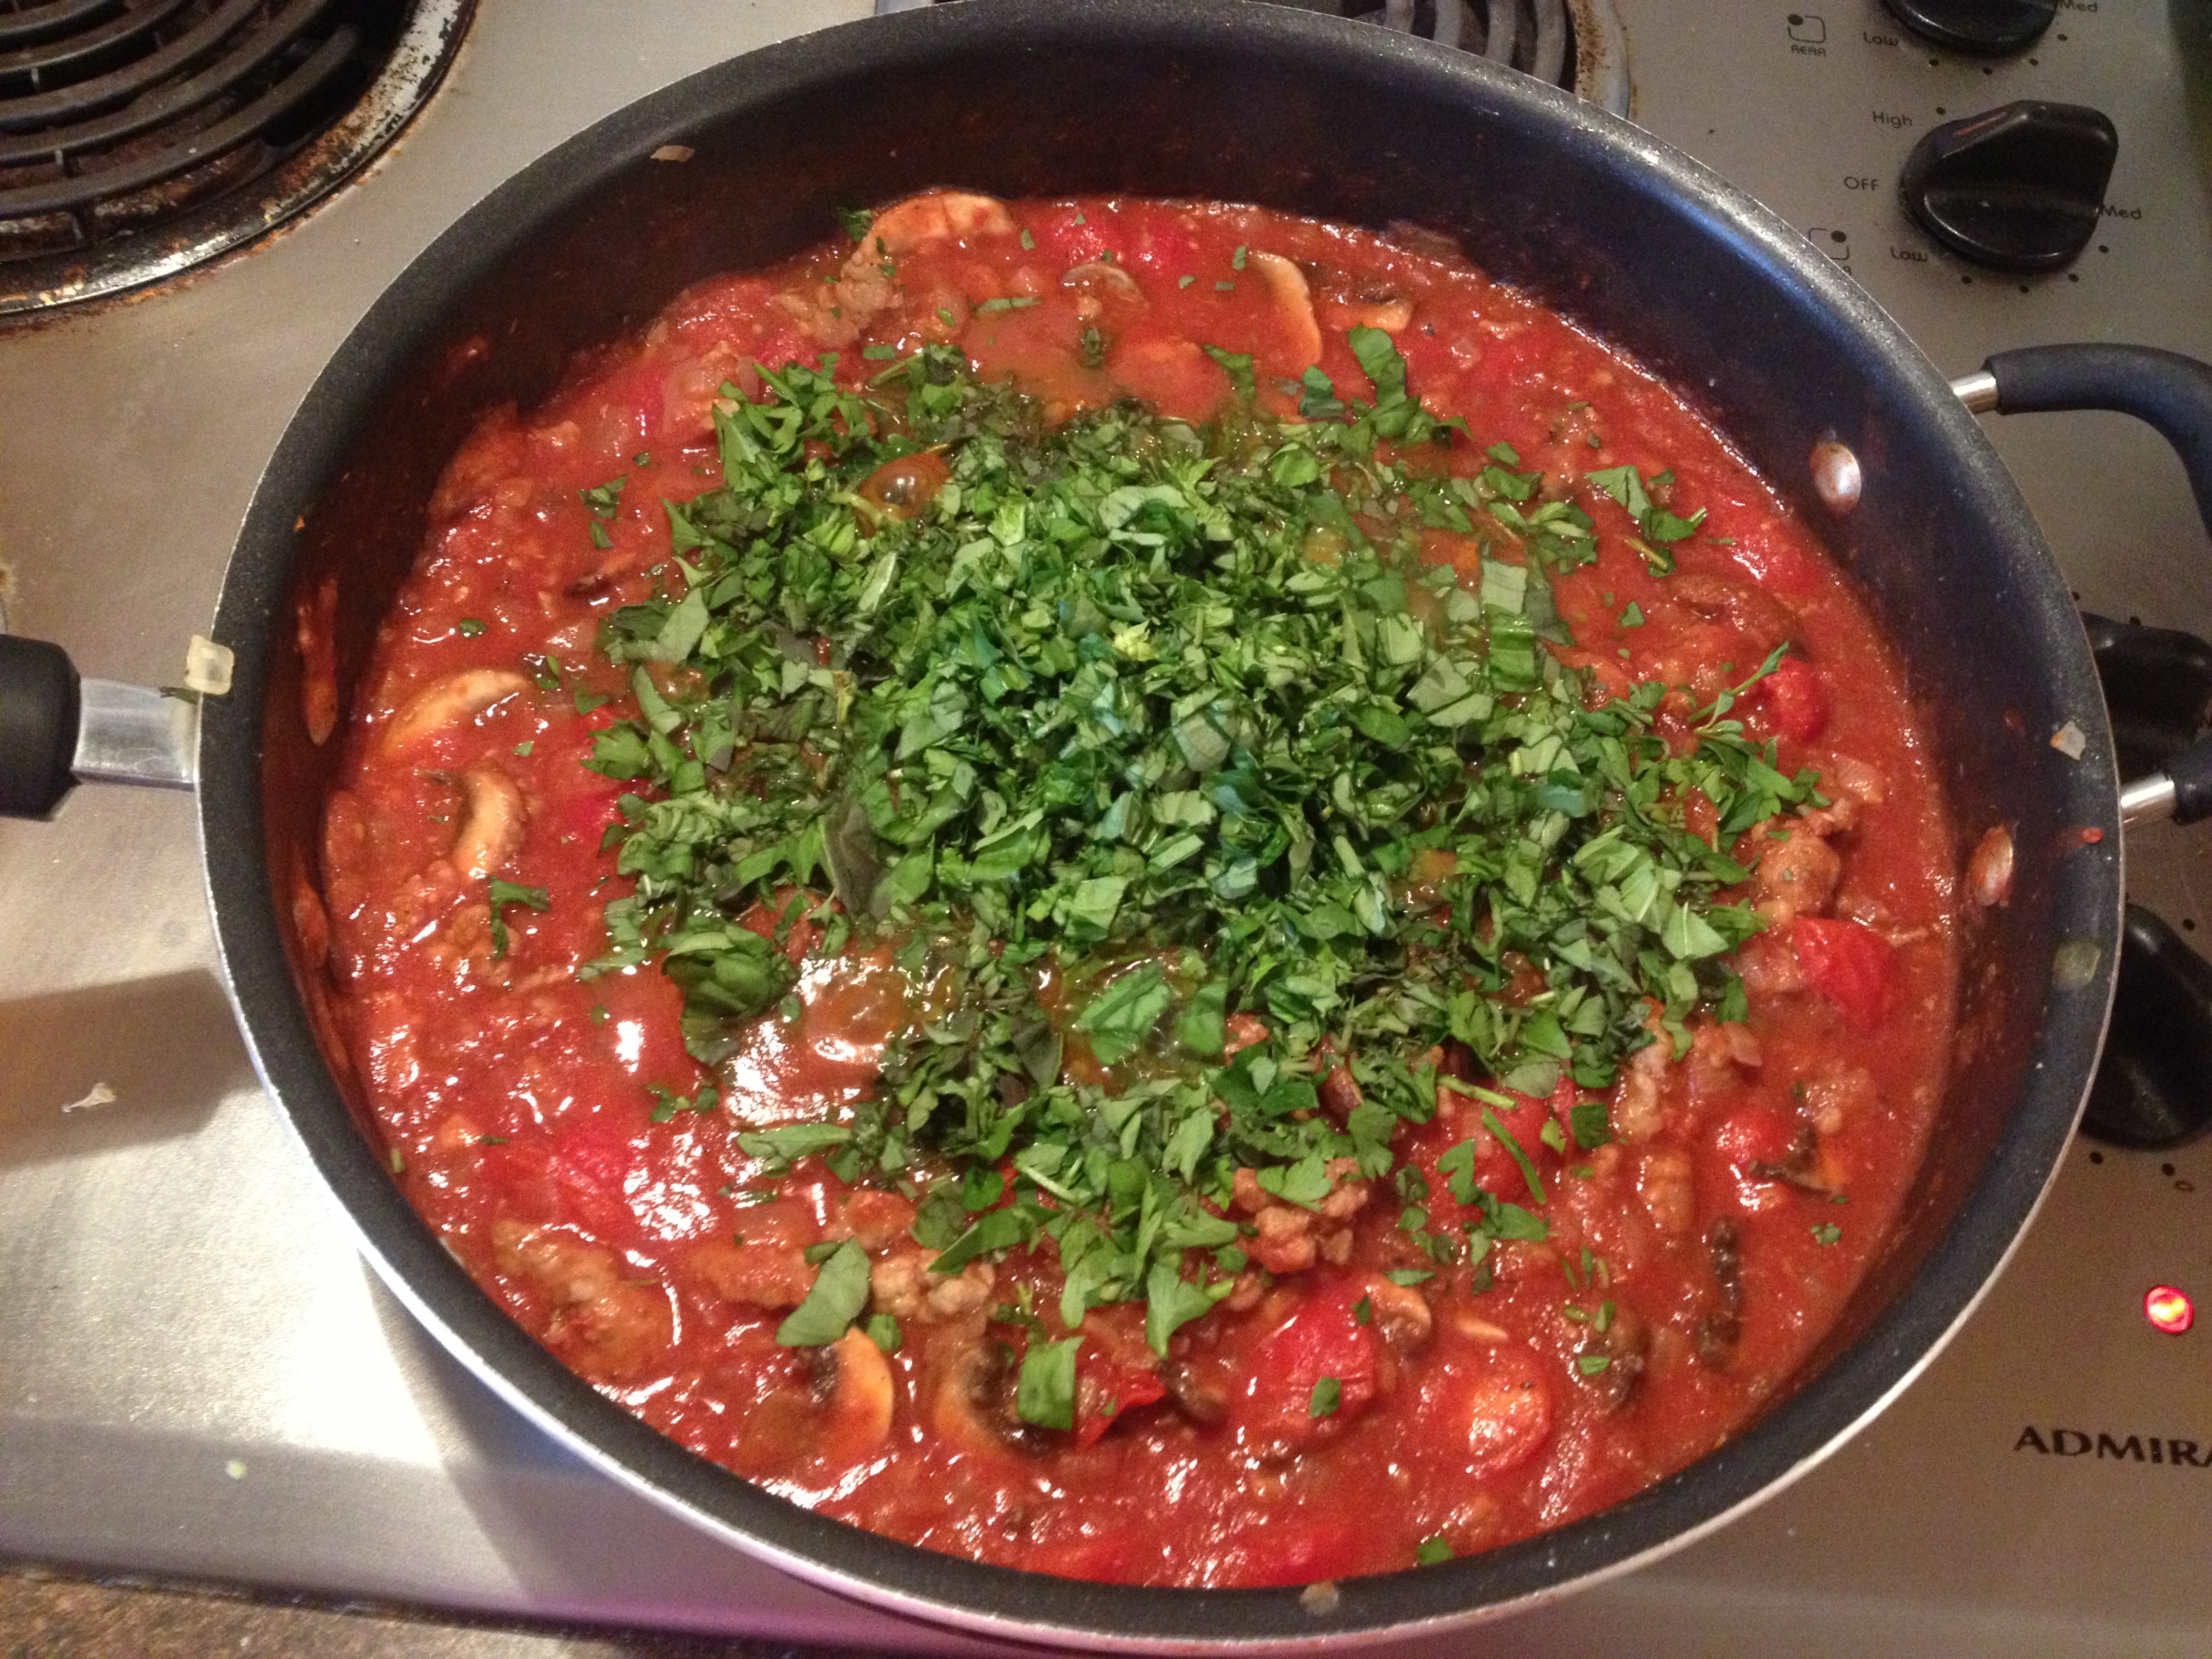
After your tomatoes have cooked down a little bit and look kinda squishy, pour in one 28 oz. can of CRUSHED tomatoes. Seriously, crushed is the way to go. This is what will make your sauce–sauce! I’ve tried using diced or stewed tomatoes, but it just doesn’t taste the same, and not to mention, you have to use an immersion blender or some other kitchen gadget to get it to the right consistency. Stir all this delicious goodness up and let it simmer for awhile. In the meantime, your spaghetti squash should be done, so get that out of the oven and let it cool. Then, toss your brusselsprouts with a little olive oil, salt, pepper, and about 1/2 tsp. of sugar (you won’t taste the sugar, but it helps brown the sprouts!), and using the same sheet pan from your squash, roast the brusselsprouts in a 400F oven for about 20 minutes (25-30 if you like softer veggies). So now, your squash should be cooling, brusselsprouts are roasting, and your sauce is simmering. Time for fresh herbs!

Image            Image

Finely chop about 1/2 cup each of FRESH oregano, flat leaf parsley, and basil, and stir into your sauce. Might want to turn the heat down to low so you don’t have marinara sauce splattering everywhere!

Image

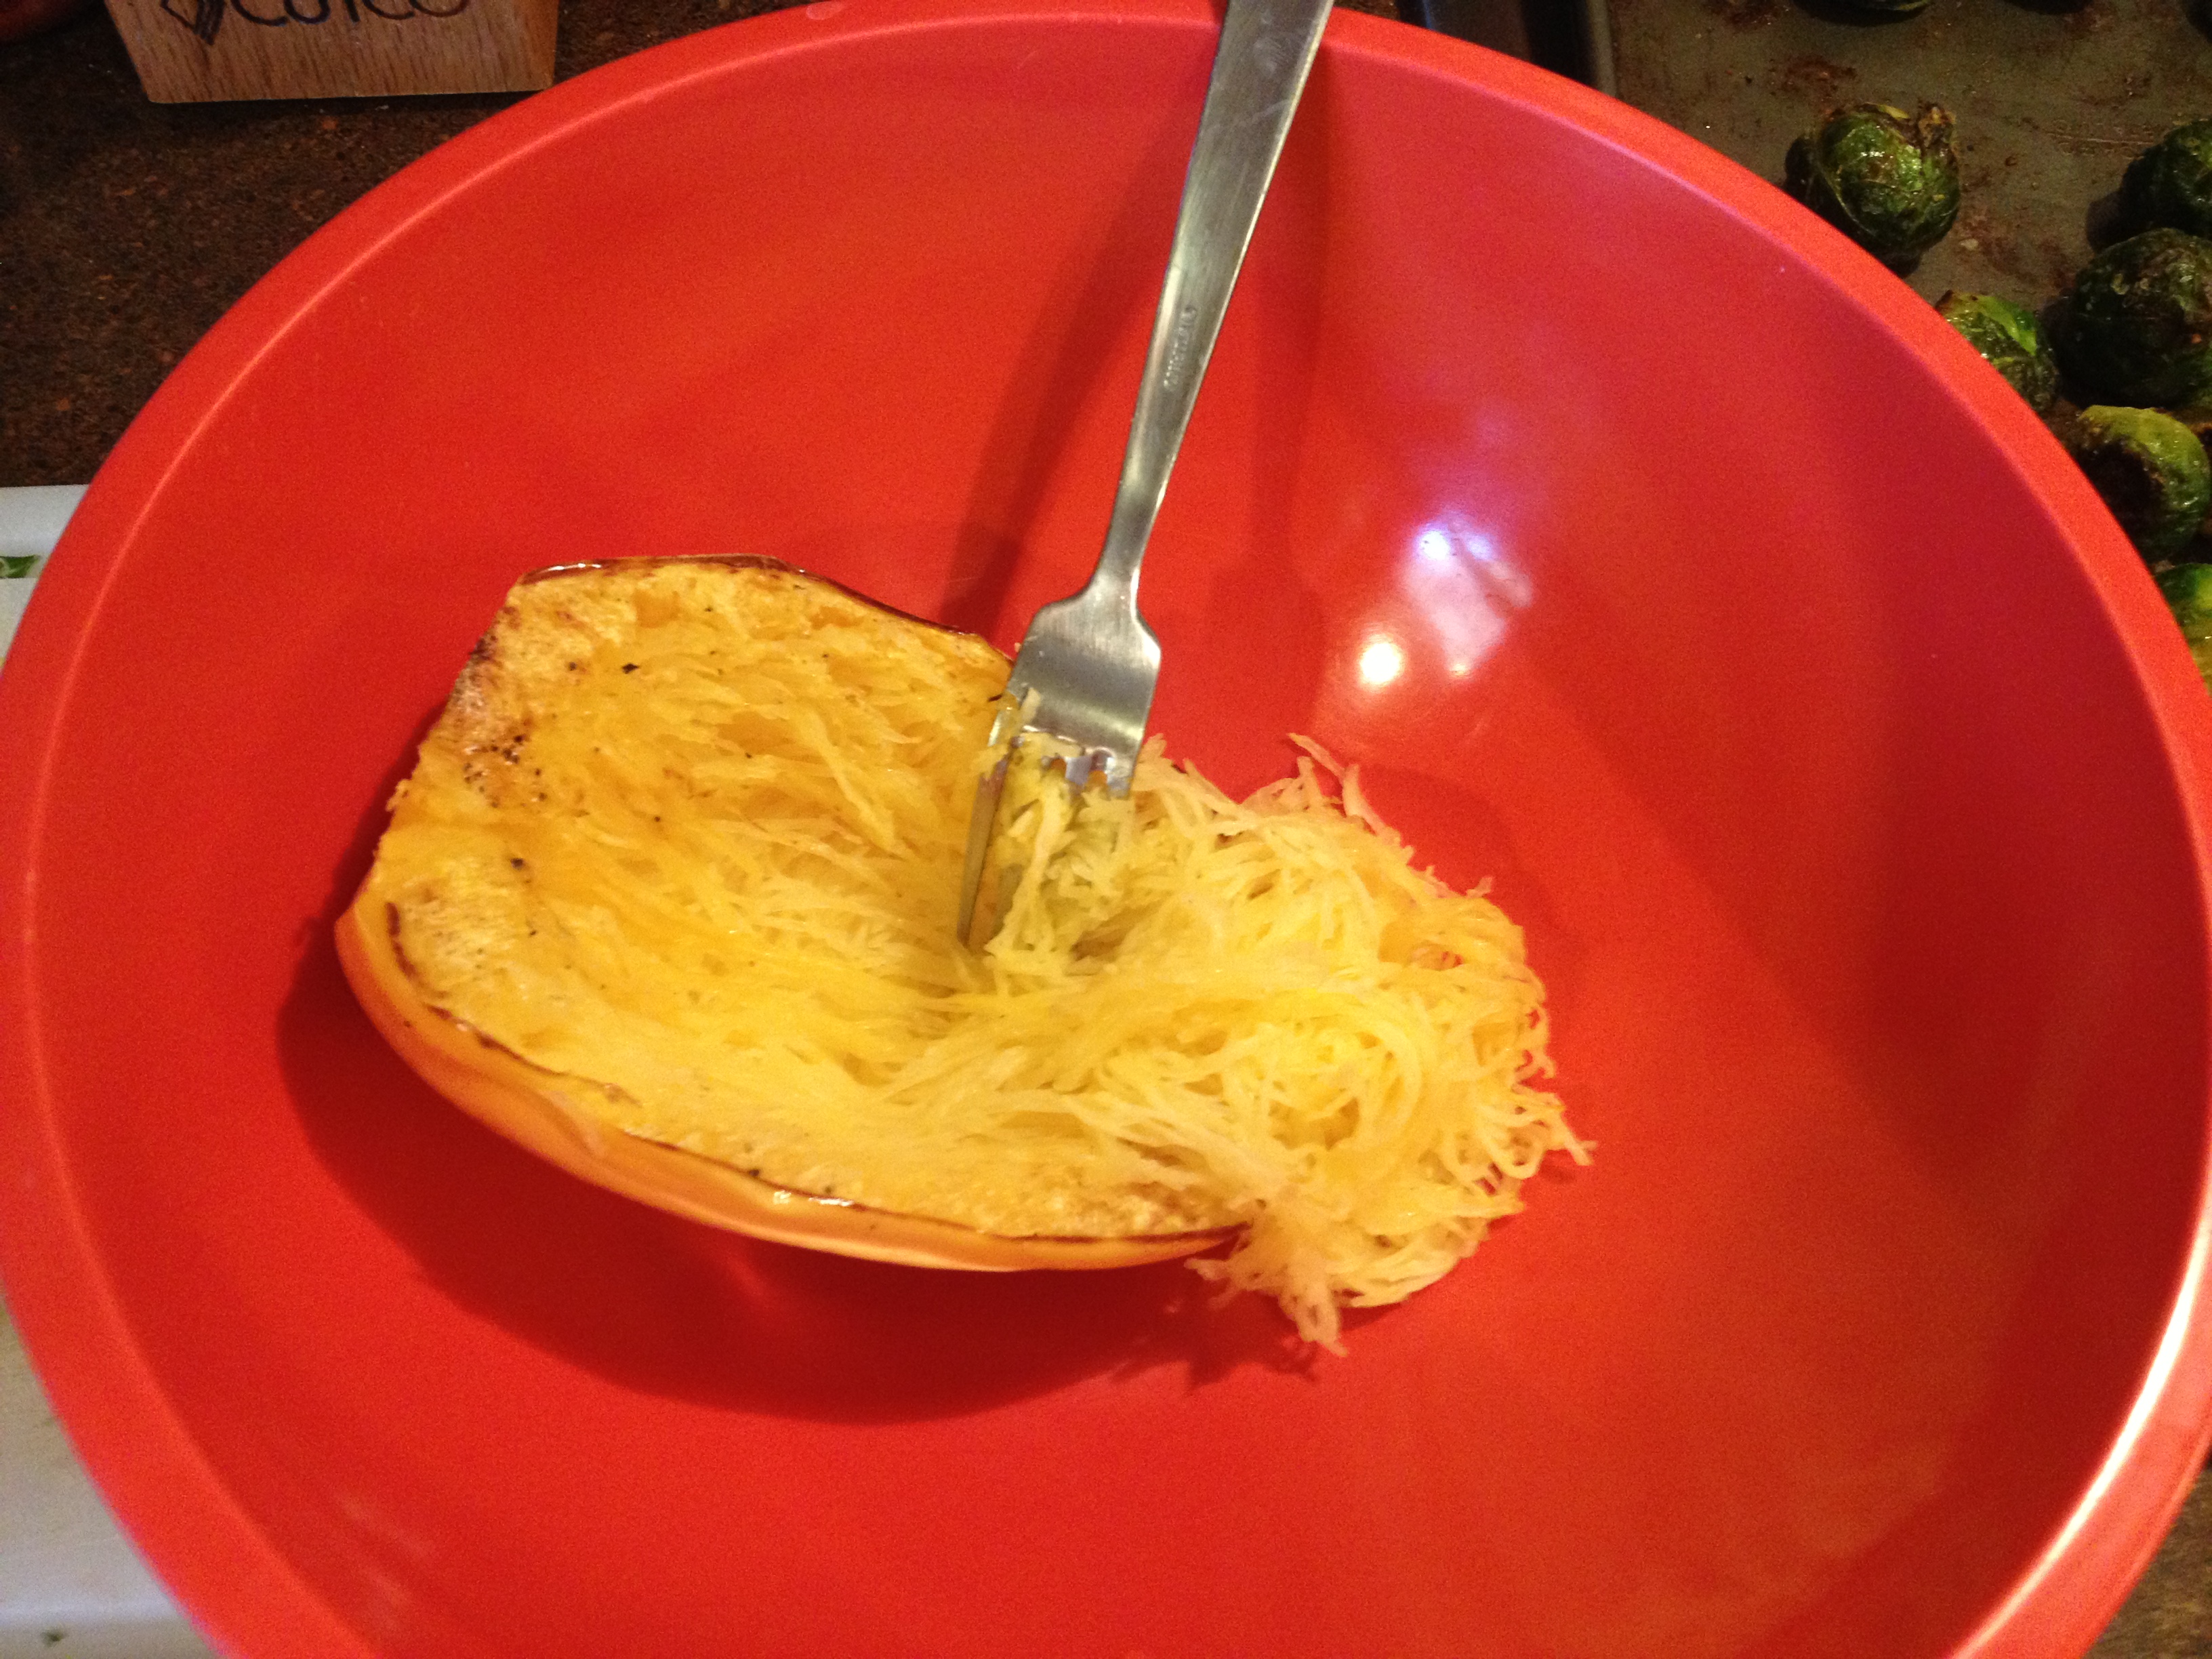
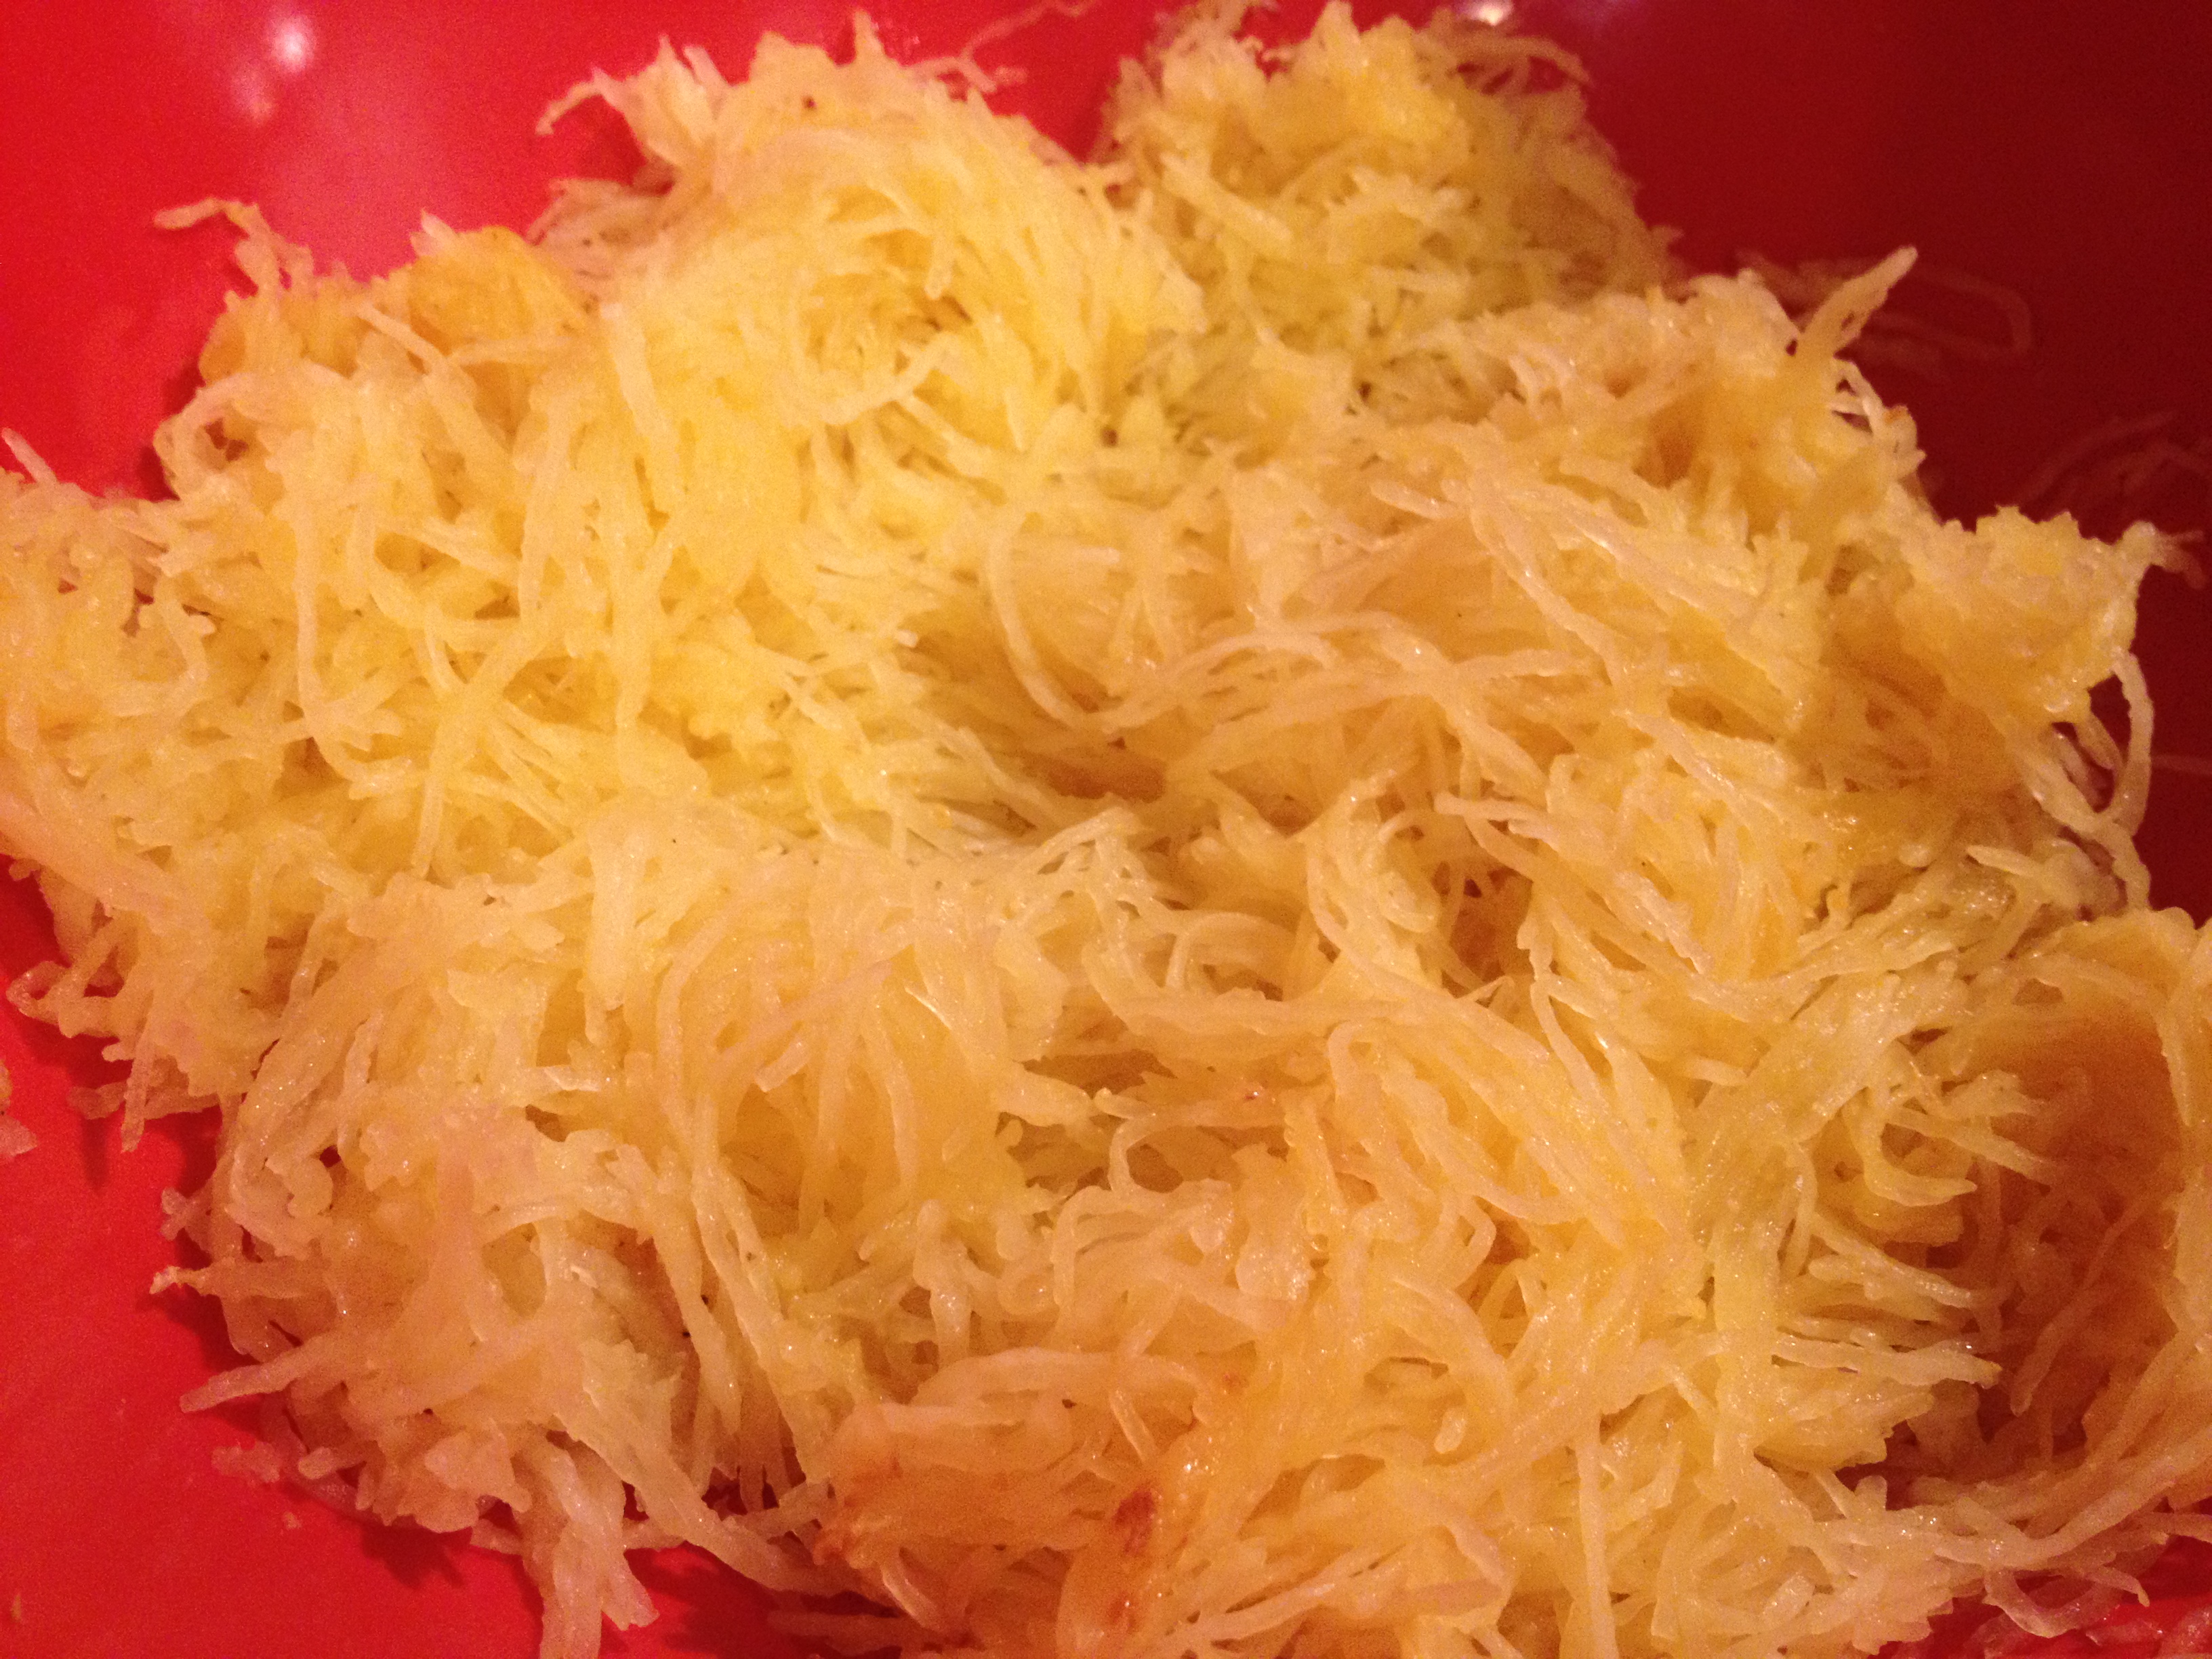
Once your spaghetti squash is cool enough to handle, carefully scrape out the seeds and discard, and then using a fork scrape out all the squash into a bowl. You can actually roast your squash ahead of time since you need it to cool, so this might help save some time if you’re a planner. Or if you are tired of waiting, wear a hot pad while you’re scraping. 🙂

Image             ImageImage

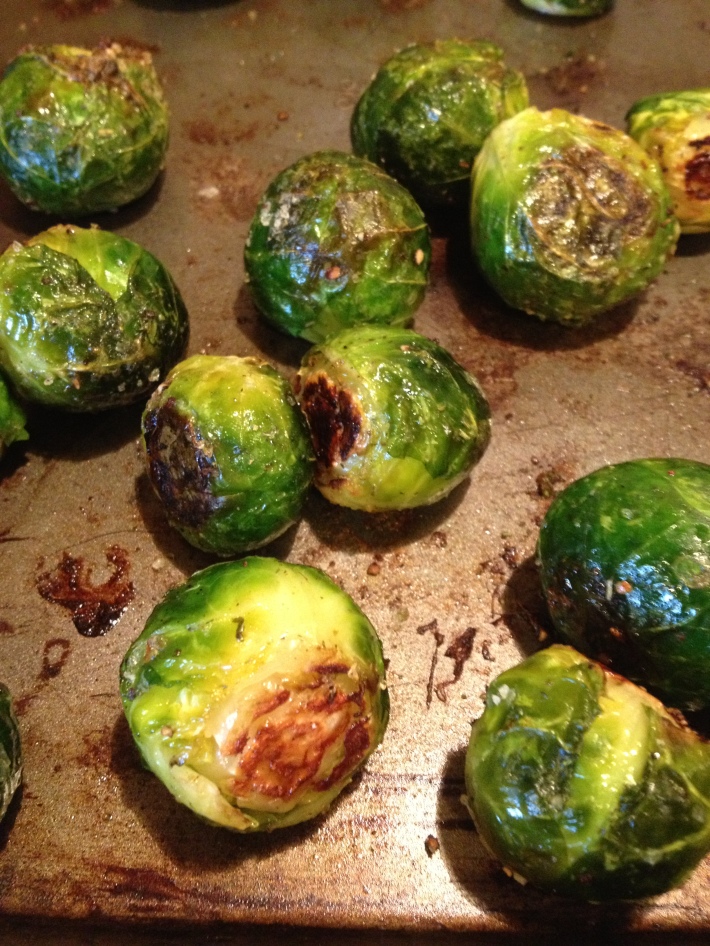
This is what the brusselsprouts should look like when they’re done. Some “burnt” looking edges, yet still green and tender. After you’ve got your “spaghetti noodles” ready, and the sprouts are out of the oven… It’s time to assemble!

Image                                   Image

Depending on the size of your spaghetti squash and your saucey-ness preference, you may not need all the sauce. As always, feel free to figure out what you like and take out the things you don’t. And as a side note–if you don’t like chunky sauce, you can always use an immersion blender to smooth it out. Best wishes to you on your journey to being fit and healthy! Just remember that eating healthy doesn’t have to be boring and tasteless. 🙂

Quick Reference Recipe:

You’ll need: 1 onion, 3-4 garlic cloves, 1 pint mushrooms (optional), 1 pint cherry tomatoes, 1 can (28 oz.) crushed tomatoes, 1 lb. lean ground turkey (optional), 1/2 c. dry white wine, 2 c. brusselsprouts (optional), 1/2 c. each of fresh basil, flat-leaf parsley, & oregano, 1 spaghetti squash, olive oil, salt, pepper, italian seasoning, 1/2 t. sugar

1. Preheat oven to 375 F. Cut spaghetti squash in half lengthwise. Drizzle insides with olive oil, and sprinkle with salt and pepper. Place flat side down on a sheet pan and roast in the oven for approx. 45 minutes. (Larger squash may take up to an hour.) When soft to the squeeze but not mushy, take out and let cool.

2. In a large saute pan on medium heat with approx. 1 tbls. olive oil, cook diced onion and minced garlic. Once onions start to become translucent, add in ground turkey. Season with salt, pepper, & italian seasoning (graciously!). For the vegan option– skip the meat and go straight to mushrooms!

3. Once meat is browned, deglaze with about 1/2 c. dry white wine. Add in sliced mushrooms and cherry tomatoes (halved) and cook until tomatoes become slightly macerated (squishy and wrinkly).

4. Pour can of crushed tomatoes into the sauce pan. Stir to combine. Finely chop all the fresh herbs and add to the sauce. Let simmer for as long as you can or choose to (low heat).

5. After the spaghetti squash is out of the oven, raise your oven temp to 400 F. Cut the ends off of all the brusselsprouts and peel off the top layer of leaves. Toss in a bowl with olive oil, salt, pepper, italian seasoning, and 1/2 tsp. sugar. On same sheet pan, roast brusselsprouts for approx. 25 minutes.

6. Once squash has cooled, remove seeds and scrape out all the “noodles” with a fork into a bowl. When everything is ready, toss the “noodles” with your sauce and top with roasted brusselsprouts.

Time: 1-1/2 hours total             Serves: 4-6

Enjoy!!

My Super Bowl Party Hit: Fruit “Pie”

Today’s recipe is all about feeling like you’re splurging. Hence, the air quotations around “pie.” I don’t know how it is for you, but staying on track with healthy eating is about 90% mental for me. I feel trapped and overwhelmed if I restrict myself too much (i.e. no carbs, sweets, alcohol, etc.). Inevitably, I end up having a major binge fest when I can’t take it any longer and feel that I MUST have bread and pasta! (yes, this just happened to me last weekend… and yes, I blame Ben for making said delicious bread and pasta…) SO- I am a pretty firm believer in  treating yourself to “bad” stuff in moderation. I try to make healthy eating choices the majority of the time, while also allowing myself some sinful foods every once in awhile in a reasonable portion-size. I have found this helps minimize the whole guilt/shame cycle of binging and then feeling horrible afterwards. But here is the good news folks: This recipe IS healthy, and you get to psych yourself out as though you are eating something delightfully sinful. Win-Win.

These are all the ingredients you need: fruit, nuts, and vanilla extract. Booya! haha.. yep, I was surprised too. More specifically, for one regular 9 in. pie dish, you need 1/3 c. each of walnuts, cashews, and almonds; 1 c. dates; 2 tsp. vanilla extract; 2-3 bananas; 1 can mandarin oranges; 1 can pineapple tidbits; about 1 pint of fresh strawberries; and some blueberries. You can actually use whatever fruit you want, except for the bananas and strawberries–those are essential to this recipe.

IMG_2069

First, put all the nuts, dates, and vanilla extract into a food processor (sidenote: I love my Ninja. It is awesome!), and pulse until it becomes a gooey mess. You may need to stop at least once to scrape the sides so that all the nuts get chopped up into smaller pieces.

IMG_2070

Once you have a gooey, sticky mess (and clean hands!), press the mixture into the bottom of a pie dish. I try to make it as even as possible.

IMG_2071

Then, slice bananas lengthwise into strips. I use a pairing knife and tried to get them as thin as possible without breaking each slice into smaller pieces. This can get tricky because bananas are slippery little boogers, so be careful not to cut yourself! Lay the banana slices on top of the crust mixture, using smaller pieces to fill in the gaps. You basically want a single layer of bananas going over the crust. It doesn’t have to be perfect though!

IMG_2072

IMG_2073

Next, I use my trusty food scale to measure out about 6 oz. of fresh strawberries. If you don’t have a scale, it is about 7-8 medium to large strawberries. Once I have my 6 oz. I slice each one in half before throwing it into the same food processor (you don’t even need to rinse it from the nuts because it’s all gonna taste so good!) and pulse/blend until you have a nice liquid puree.

IMG_2074

Pour the puree on the banana slices and use a small spatula to spread it across evenly. The puree is what is going to help your pie stick together, so you’ll want to get it into every crevice if possible! (Is it weird to say crevice in a recipe?? It sounds weird.. but seriously, get that puree everywhere.)

IMG_2075

Now the fun part– Sprinkle on whatever fruits you like! I like the double-whammy strawberry effect, so I added sliced strawberries first (about 5-6 strawberries sliced). Then, I drained the cans of mandarin oranges and pineapple tidbits and added those. Last but not least, I sprinkled some blueberries on top for another dash of color. After you are done adding your fruits, gently press the fruits so that they are all touching or are somewhat involved with the strawberry puree. They need its stickiness! Cover with plastic wrap, and refrigerate for at least one hour before eating.

IMG_2082

And here she is… a gorgeous Fruit “Pie!” I made this for the Super Bowl Party we attended last weekend, and it was a smash hit! I think everyone appreciated the healthy option. This is a great recipe to keep around to make everyone happy–health nuts, sweet eaters, vegans, kids, you-name-it.

IMG_2083

You can also make this in a pyrex dish if you want. I made a double batch and only had one pie dish, and it worked quite well! To close this post– I want to give credit where credit is due. First, I have to thank my good friend, Robin, for introducing me to this recipe (although I’ve never tasted her version, I’m sure it is just as amazing!). Second, this recipe is originally from The Engine 2 Diet website (http://engine2diet.com/recipe/date-nut-fruit-pie/). In my version, I added a little more vanilla extract for better crust consistency (helps it get a little stickier so it stays together when you slice it into pieces); switched out some of the fruit (I can’t stand fruits with little seeds, so cut out the raspberries!); and used about 6 oz. of strawberries for puree instead of only 4 oz (I didn’t think 4 really covered the whole pie very well). Feel free to try their recipe to compare, or just trust me and my little test kitchen. I won’t steer you wrong. Happy Eating!! I hope you will enjoy this “pie” completely guilt-free.

IMG_2084

Quick Recipe:

1/3 c. almonds
1/3 c. walnuts
1/3 c. cashews
1 c. dates
2 tsp. vanilla extract
2-3 bananas, sliced lengthwise
6 oz. fresh strawberries, pureed + 4 oz. fresh strawberries, sliced
1 can mandarin oranges, drained
1 sm. can of pineapple tidbits, drained
2-3 handfuls fresh blueberries

***Combine nuts, dates, and vanilla in a food processor until a sticky consistency is formed. Press mixture into the bottom of a pie dish. Layer banana slices across crust mixture. Pour strawberry puree over bananas, spreading evenly across entire dish. Sprinkle on all other fruit and gently press into puree when completed. Cover with plastic wrap, and Refrigerate for at least 1 hour before serving.***

Keepin’ It Simple: A Quick Stir-Fry Lunch

My approach to cooking, especially when it comes to making healthy dishes, is to use fresh ingredients and to keep it simple! Well… that is.. unless I am feeling particularly ambitious and in the mood to try something new and fancy. But that is not usually the case and is definitely not the case today! Although I am no expert chef or nutritionist, I have figured out what works for me in my pursuit of maintaining a healthy lifestyle. I think convenience plays a big part in determining what you eat. Therefore, I’ve found it’s important to do the prep work! (This includes planning ahead for snacks in between meals too!) For my first recipe, I am going to not only share with you the ingredients to a dish, but my little tricks of the trade as well. I hope you find this helpful the next time you get in the kitchen!

First, I usually buy the boneless, skinless chicken breast in the fresh meat section at the grocery store. I watch for sales and stock up like 10 packages and put them in the freezer until I’m ready to use it. Then, when I have a defrosted package of chicken ready to cook, I pull out my trusty food scale to measure out the portion sizes I want to eat. I cut off all the fat and any funky stuff that doesn’t resemble plain old chicken breast, and I cut it into pieces that are about 4 ounces each. Why 4 oz. you ask?? I don’t know to be honest. I probably read it somewhere and it stuck with me, but regardless of where it came from, I have found that it is a reasonable portion size for me and for Ben. We have yet to walk away from a meal hungry where we each consumed 4 oz. of meat + veggies.

IMG_2050

Whatever I don’t want to use right then, I put in a ziplock bag so that I will already have portioned out chicken ready to go the next time I make a meal. Wah-la!

IMG_2051

Next, for this recipe, I cut my 4 oz portion into small bite size pieces and throw into a medium sized skillet that has been heating up on Medium heat with about a tablespoon of olive oil. Immediately season with salt, pepper, cumin, and Italian seasoning. For a one-person serving, I would use about 1 tsp. of salt, 1/2 t. pepper (fresh ground preferably ), 1/2 tsp. ground cumin, and about 1 tsp. of Italian seasoning. My absolute favorite premixed seasoning is this Italian Seasoning Grinder:

IMG_2052

It’s easy and awesome. I use it ALL the time–on chicken, veggies, pasta, fish, you name it…  Depending on how big you cut the chicken chunks, you may not have much time to get your veggies in the skillet so everything will be just the right done-ness at the same time. So keep an eye on your chicken! You don’t want it to get too browned or you’ll be in danger of nasty dry chicken that desperately needs to be rescued by a sauce. And I’m not sharing a sauce recipe today!  If you’re worried you won’t chop stuff fast enough, get everything cut up and ready before you throw anything in the pan. Then, you can babysit your food and make sure it doesn’t do anything crazy.

For the vegetable part of this simple stir-fry, I used what I had in the fridge. Seriously. This is what I had. I usually try to mix things up with a variety of textures and color (green beans and orange/red bell peppers are one of my favorite combos!), but all I had were green beans and asparagus. Feel free to use whatever veggies you have! Regardless of the vegetable, I suggest cooking it where it still has a bit of crispness and bright color to it. You don’t want to completely cook out all the nutrients and lovely texture and end up eating mush! When I make fresh green beans, I wash them and grab a handful at a time to chop off the ends and cut them in half (or whatever size you prefer).

IMG_2056

And for the asparagus, I use a trick I learned watching the Food network.. yes. I’m a dork. I absolutely love the Food Network. When you bend an asparagus spear around its bark, it will naturally break where the stringy, chewy bark ends. So, bend one and let it snap (get it.. bend, and snap! haha). Then, align 3-4 spears together and cut them at the same point. I like to chop these into bite size pieces as well. Ideally, I try to cook 4 oz. of meat and a handful (about 1 cup) of veggies per meal. My goal is not to get super full but to feel sustained. I want to eat just enough food to not be hungry for the next 2-3 hours (which is snack time!). I will post some snack options sometime. My current obsessions are roasted almonds or celery w/all-natural peanut butter!

IMG_2053

 IMG_2055

Asparagus does not take long to cook before it starts to turn a pale ugly green color (you don’t want that!), so when your chicken is about halfway cooked, add the green beans. After a minute or two, add the asparagus. The chicken should be almost done when you add the asparagus. If you’re not sure, take a piece of chicken out and cut it in half to check for any pink spots. When the chicken is completely white, ever-so-slightly browned, it is done. After a few times, you’ll get the hang of it! Make sure you add in a little bit more of the same seasonings after adding the veggies (just a dash or so of each).

IMG_2057

If it seems like the veggies are not cooking fast enough and your chicken is almost done, put a lid on the pan to help speed up the process. I’ve found the steam from doing this also helps keep the food moist. Lastly, I have started using a salad plate/small plate for my meals to help with portion control. I think it’s a mental thing. My plate is full, but it’s a reasonable amount of food.

IMG_2059

That’s it folks! I know this may be super easy for some of you, but I wanted to start my blog of recipes with something that is simple, tasty, and healthy. This is a meal that you can substitute your favorite seasonings and vegetables with and keep it in your back pocket for any time you need a nutritious meal fast. I made this in about 10-15 minutes plus the time to portion out the whole package of chicken for future use. As my brother and sister-in-law say… Let’s get healthy!

Quick Recipe View:

4 oz. boneless, skinless chicken breast

1/2 c. fresh green beans

1/2 c. fresh asparagus

1 t. salt

1-2 t. Italian seasoning

1/2 t. fresh ground pepper

1/2 t. cumin

1 T. olive oil

**Preheat medium-sized skillet  to Medium heat with olive oil. Cut chicken into bite size pieces and brown in hot skillet. Cut the ends off the green beans and add to skillet when chicken is about halfway cooked (for 1 in. pieces of chicken, this is about 3-4 minutes). Chop up asparagus spears using technique described above and add to skillet when chicken is almost done. Asparagus only needs 2-4 minutes of cooking time in a hot skillet to keep it crisp and green. You can either season the chicken while it’s alone in the pan and then add another dash of two of seasonings after all the veggies are in, or you can just season the whole pan once everything is in. (I prefer to season the chicken first so the flavor gets cooked in better.) Stir ingredients until chicken is lightly browned with no pink spots, and veggies are still crisp and bright green.

Blog Post Numero Uno

Usually when a new year rolls on in I go to a party (or have one), eat my cabbage and black-eyed peas, have a glass of champagne, and go about the next day as if it were still the year before. This year, 2013, was a little different. Of course, I still did all of the above, but when all the fun was over, Ben (my husband) asked if I had made any resolutions. For some reason, this time, I got to thinking. What had I accomplished in 2012?

On one hand, I felt as though I had been lazy and unproductive. Time continued to pass by, and I continued to procrastinate on my dissertation. I did not even TOUCH the thing for 6 months. Six months. What the heck… I started to let my mind go down the path of what might have been. Oh, you know, like Dr. Amanda Szarzynski. That could have happened. However, it didn’t, and I know there are various reasons why in some way, that is ok. On the other hand, I thought of what I HAD done. I started my own business that has continued to be fairly successful, and I began a lifetime journey of fitness and healthy living. Not that I was super unhealthy before but I was definitely not mindful about the things I was putting in my mouth–whether that be portion size or nutritional value, and I had no consistent workout regime. In May of 2012, I started going to a bootcamp workout class (shameless plug: Train Insane with Destiny Flores!) with a friend and fell in love with feeling fit. I’m the kind of person that once I start working out, it makes me want to eat healthy. I mean, what’s the point of working out if I’m gonna go stuff my face with a cheeseburger and fries afterwards?! I wanted to see results from my efforts at the gym, and I discovered the road to results consisted of eating well. When I ate crap, I felt sick (literally) at bootcamp, so it just made sense to go all in–healthy eating, working out hard– the whole shebang.

Workout pic

So after some thought and conversation with Ben, I came to the realization that not only had I been “productive” in a different way than I have known myself to be in the past, but ultimately I have made an important change in the way I do life. This change (eating healthy and exercising) is just one step though.

One of the first concepts I learned in undergrad was the “Bio-Psycho-Social” approach to assessing problems and provoking change. I like to add “-Spiritual” to the model, as do many folks I know. So in those terms, I have made some positive changes in the Bio or physical aspects of my life, as well as the Psycho or mental/emotional parts simply by eating better and working out. I want to continue growing and learning in the Social (relationships) and Spiritual parts as well. My hope  in creating this blog is to not only share some good recipes and support living a healthy lifestyle (notice I have not said the dreadful “D” word..), but to also create an environment of thoughtful conversation and accountability. Thanks for reading!